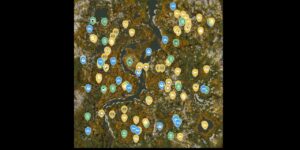
Satisfactory Map

Crash-landing on the alien world of MASSAGE-2(A-B)b, pioneers quickly discover that raw ambition alone won’t build a functioning factory – knowing exactly where resources are located makes the difference between thriving and spending hours lost in the wilderness. That’s where the Satisfactory Map becomes an essential tool, providing precise, filterable markers for every resource node, collectible, and point of interest on the planet. From Pure-grade Iron and Copper nodes in early-game zones to late-game deposits of Caterium and Bauxite, every location is graded by purity so you can plan extraction setups before placing a single Miner.
Tracking down Mercer Spheres, Somersloops, Hard Drives, Power Slugs, and Underground Access points without a reliable reference burns time that belongs in your production lines. The Satisfactory Map covers all of these categories with the same level of precision, giving both new pioneers and veteran engineers a dependable foundation for pushing toward 100% completion. Whether you’re plotting your first Iron smelter or optimizing a continent-spanning late-game network, having every node and collectible mapped means your decisions stay informed and your factory keeps moving forward.

How to Use the Satisfactory Map
Locations and Exploration: The Underground Access markers reveal entrances to cave systems and subterranean zones that are easy to miss when navigating MASSAGE-2(A-B)b on foot or by vehicle. Toggle this category on when you’re expanding your exploration footprint or need to route conveyor belts and pipelines through underground passages efficiently.
Resources – Pure, Normal, and Impure: Resource nodes are split into three purity tiers – Pure, Normal, and Impure – each represented by separate, filterable categories. Pure nodes output double the resources of Impure nodes at the same Miner tier, so identifying and prioritizing them early shapes the entire direction of your factory. Use the resource filters to isolate specific materials like Crude Oil, Nitrogen, or SAM across all three purity grades, then plan your extraction infrastructure before committing to a layout.
Collectibles and Secrets: Hard Drives unlock Alternate Recipes through AWESOME Shop research, making them one of the highest-value collectibles in the game. Boom Box Tapes, Mercer Spheres, and Somersloops are also tracked, giving completionists a clear checklist to work through. Filter these markers individually to sweep each region systematically rather than stumbling across them by chance.
Power Slugs: Blue, Purple, and Yellow Power Slugs each produce different grades of Power Shards when processed in a Slug Crusher. Power Shards overclock your machines beyond their base limits, which is critical for late-game throughput targets. The map marks all three slug types separately so you can prioritize Yellow and Purple slugs for maximum overclocking potential.
What the Satisfactory Map Can Do
Plan Factory Locations Around Node Purity
Selecting a factory site without knowing the surrounding node grades is a common mistake that forces costly relocations later. The Satisfactory Map lets you layer Pure, Normal, and Impure markers for any resource type simultaneously, giving you a full picture of extraction potential before you build. Identifying a cluster of Pure Iron and Pure Copper nodes close together, for example, can define the foundation of an efficient early-game hub that scales into late-game production without needing relocation.
Optimize Power Shard Collection Routes
Power Shards dramatically increase machine output when used for overclocking, and collecting enough Yellow and Purple Power Slugs to sustain an overclocked factory requires deliberate routing. Enabling the Power Slug markers on the map lets you plot an efficient sweep route across MASSAGE-2(A-B)b, collecting high-value slugs in the fewest trips possible. This is especially valuable in mid-game when power demands start outpacing basic generator setups.
Track Hard Drives for Alternate Recipe Unlocks
Hard Drives are among the most impactful items in Satisfactory because Alternate Recipes can dramatically reduce the resource cost of key components like Rotors, Stators, and Encased Industrial Beams. Each Hard Drive requires finding a crash site, and the map marks every one of them across the world. Systematically collecting Hard Drives using the map’s markers accelerates your research progression and opens up recipe options that fundamentally change how your factory operates.
Locate Underground Access Points for Infrastructure Routing
Cave systems in Satisfactory are more than just exploration zones – they provide sheltered corridors for running conveyor belts, pipelines, and power lines in ways that avoid surface terrain obstacles. The Underground Access markers identify every entrance point, letting you assess whether tunneling through a specific cave network is worth it for a given pipeline route. This level of spatial awareness is difficult to develop from surface exploration alone and saves significant time during large-scale factory expansions.
Support 100% Completion and Full Resource Coverage
Achieving full map completion in Satisfactory means accounting for every collectible type – Boom Box Tapes, Mercer Spheres, Somersloops, Hard Drives, and all three Power Slug grades. The map’s category filters let you track each type independently, marking off items as you collect them so nothing gets overlooked. For players targeting complete resource network coverage, the ability to cross-reference every SAM, Uranium, and Geyser node by purity tier ensures no extraction opportunity is left on the table.
Satisfactory Map Overview
A quick reference for the key features of this interactive map.
| Category | Example | Why It Matters |
|---|---|---|
| Resources: Pure | Iron (P), Copper (P), Caterium (P) | Pure nodes output the highest resource volume per Miner tier, making them the priority targets for high-throughput factory planning. |
| Collectibles | Hard Drive, Somersloop, Mercer Sphere | Hard Drives unlock Alternate Recipes that reduce production costs, while Somersloops and Mercer Spheres interact with AWESOME Sink and production amplification systems. |
| Power Slugs | Yellow Power Slug, Purple Power Slug | Higher-grade slugs produce better Power Shards for overclocking machines, directly increasing your factory’s output ceiling. |
| Locations | Underground Access | Cave entrances enable sheltered infrastructure routing for conveyors and pipelines, bypassing complex surface terrain. |
| Resources: Impure | Uranium (I), Crude Oil (I), Sulfur (I) | Knowing impure node locations helps identify lower-priority extraction sites and informs decisions about whether to supplement output with Mk.2 or Mk.3 Miners. |
Frequently Asked Questions
What does this Satisfactory map cover?
The Satisfactory Map covers the full world of MASSAGE-2(A-B)b with markers across six major categories: Locations (Underground Access), Collectibles (Boom Box Tapes, Hard Drives, Mercer Spheres, Somersloops), Power Slugs (Blue, Purple, Yellow), and Resources split into Pure, Normal, and Impure tiers for all major materials including Iron, Copper, Caterium, Bauxite, Crude Oil, SAM, and more.
How does this map help with completion?
The map provides filterable markers for every collectible and resource type in Satisfactory, letting you track each category independently. Players targeting full completion can isolate Hard Drive crash sites, sweep all three Power Slug grades by region, and cross-reference every resource node by purity – eliminating guesswork and missed items during exploration sweeps.
Are collectibles included on this Satisfactory map?
Yes. The map tracks all four collectible types: Boom Box Tapes, Hard Drives, Mercer Spheres, and Somersloops. Hard Drives are particularly valuable because they unlock Alternate Recipes through AWESOME Shop research. Each collectible type has its own filter, so you can focus on one category at a time without visual clutter from unrelated markers.
Does this map support factory planning and progression?
Directly. The resource markers are divided into Pure, Normal, and Impure purity tiers for every material, which is the most critical variable in Satisfactory’s factory planning. Identifying Pure-grade deposits of key materials like Caterium, Coal, or Bauxite before building allows you to position production facilities around the best available extraction points from the start, avoiding costly relocations as your factory scales.
Is this Satisfactory map complete?
The Satisfactory Map covers all marker categories available for the game, including every resource material across all three purity grades, all four collectible types, all three Power Slug grades, and Underground Access locations. The map reflects the full scope of trackable content for MASSAGE-2(A-B)b, giving pioneers everything they need to plan and complete their time on the planet.
Credit: Satisfactory Map by MapGenie