![]()
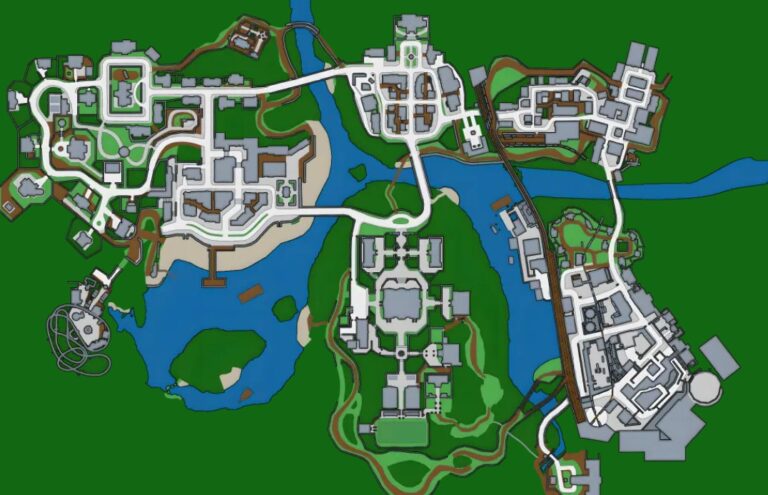
Wuthering Waves Interactive Map
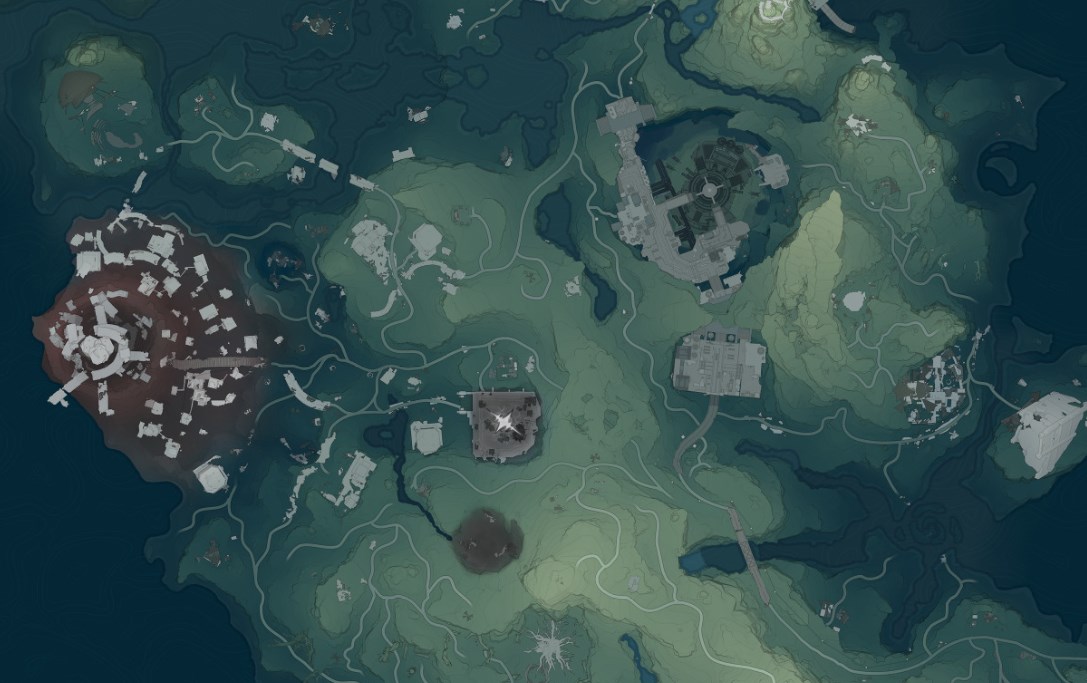
The Wuthering Waves Map gives you a clear look at how the world is laid out, making it way easier to understand where everything sits across each region. Since it also works as a full Wuthering Waves Interactive Map, you can quickly see where challenges, collectibles, materials, animals, bosses and quest points tend to appear. The world has a lot going on, so having it all in one place helps you plan better routes, figure out where to farm things and decide which areas are worth exploring next. And because the game mixes open fields with high cliffs, deep valleys and strange pockets of Tacet activity, the categories on the map help you get a better sense of how each part of the world pulls you in a different direction.
How to Use the Wuthering Waves Maps
- Location categories include Forgery Challenges, general Location markers, Resonance Beacons, Resonance Nexus points, Tacet Fields, Tactical Holograms and Vendors.
- Collectible categories include Blobflies, Sonance Caskets and several types of Chests.
- Loot categories include Advanced, Basic, Medium, Premium and Scattered Chests along with Tidal Heritage.
- Enemy categories include Boss encounters across the map.
- Quest categories include Side Quests.
- Ascension Materials include Belle Poppy, Coriolus, Iris, Lanternberry, Pecok Flower, Terraspawn Fungus, Violet Coral and Wintry Bell.
- Ore categories include Floramber, Fragipurple, Lampylumen and Scarletthorn.
- Animal categories include multiple lizard, frog and butterfly types.
- Material categories include Angelica, Bird Eggs, Bittberry, Bunnywort, Caltrop, Chromeshell, Cliffrecluse, Climbing Fig, Dewvetch, Dripsnail, Edodes, Erodorchid, Fowl Meat, Gemberry, Gloom Slough, Honeysuckle, Lemongrass, Lotus Seeds, Noctemint, Pearl Leaf, Perilla, Raw Meat, Umbragricus, Viola, Waterlamp and more.
- Other categories include Miscellaneous points and NPC locations.
What the Map Can Do
Regional Coverage Overview
Once you start exploring, you’ll spot how much the Wuthering Waves Map helps tie the world together. The Resonance Beacons and Nexus points basically act as the backbone of your travel flow. They sit in smart spots and nudge you toward cliffs, ruins or fields that might hold something interesting. Tacet Fields show where tougher encounters or special combat moments sit, so spotting them early helps you avoid surprises or chase bigger challenges when you feel ready.
Then you’ve got Tactical Holograms and Forgery Challenges. These events pop up in places that encourage you to take different routes, and they’re often near open spaces where combat feels more fun. Vendors are spread out just enough that you’ll always run into one after a long farming loop or a boss run.
Chests, collectibles and rare items sit between these main points. Advanced Chests and Premium Chests usually hide in spots that reward curiosity, while Basic and Medium Chests fill in the world’s quieter paths. Tidal Heritage marks larger treasure points that help push your progression a bit faster. With everything placed across cliffs, valleys and ruins, the map helps you see patterns in where loot tends to gather.
Materials, Enemies and Farming Routes
One of the biggest things the Wuthering Waves Interactive Map helps with is farming. There are tons of ascension materials, and each one lives in different terrain. Belle Poppy and Coriolus sit in lighter, open areas. Iris and Violet Coral appear in more dramatic or scenic zones. Pecok Flower and Lanternberry show up around softer, quieter spots. Terraspawn Fungus and Wintry Bell sit in themed environments that match their names, and seeing them all together helps you plan clean loops.
Ore nodes matter a lot too. Floramber appears everywhere, and its huge count means you’ll bump into it constantly. Fragipurple and Lampylumen sit in denser clusters, which makes them great for efficient routes. Scarletthorn shows up in strong pockets across certain regions, so spotting its placement saves a lot of time.
Animals add even more texture to the world. Blue Butterflies and Red Butterflies appear in huge numbers and help create lively fields. Lizards like the Silver-Banded Lizard or Green Pit Lizard move through rocky areas, while frogs cluster near water or damp paths. Phoenix Butterflies and Golden Dragonflies appear in more energetic patterns, making certain fields feel more alive.
Material nodes pull it all together. Angelica, Gemberry, Lemongrass, Pearl Leaf, Perilla and Noctemint show up everywhere, and their high counts make them great for steady farming. Others like Cliffrecluse or Chromeshell appear in tighter clusters, so knowing their locations helps a lot when you need them for upgrades. Dripsnails, Edodes and Dewvetch spread across shaded or soft-soil areas. Waterlamp and Erodorchid pop up in spots with more dramatic lighting or moisture. The mix makes each region feel a little different as you move through it.
Exploration Flow, Combat Planning and Long-Term Progression
Once all of these categories sit side by side, the map becomes a useful tool for building your own rhythm in the world. You might start by following Resonance Beacons, grabbing chests on the way, and cutting through hills where butterflies and lizards sit. Then you spot a Tactical Hologram or a Forgery Challenge and jump into a fight. After that, maybe you swing through a cluster of Floramber or gather some ascension materials you passed earlier. And if you’re feeling bold, you might track down a Boss nearby since their locations are clear on the map.
Side Quests often sit near animals, materials or ruins. Seeing them marked helps keep exploration smooth. You can grab a quest, follow its trail and pick up resources without losing progress. NPCs are spread out, but most sit in logical spots that link with other activities, so you naturally run into them as you follow farming loops or scenic paths.
The world is huge, but the categories make it feel less overwhelming. When you know where Orion butterflies cluster or where Scarletthorn lines a cliff or where Blobflies float quietly over grass, you start recognizing patterns faster. And once these loops sink in, the whole world becomes a lot more enjoyable to explore, whether you’re grinding, sightseeing or hunting for a few missing collectibles.
Map Table
Here’s a quick look at a few of the categories on the map.
| Category | Example Item | Type |
|---|---|---|
| Sonance Casket | Casket Node | Collectible |
| Resonance Beacon | Travel Point | Location |
| Tidal Heritage | Loot Point | Loot |
| Boss | Major Encounter | Enemy |
| Floramber | Ore Cluster | Ore |
FAQs
Does the map include every chest type
Yes, all chest types appear, including Premium, Medium and Advanced.
Are Resonance Beacons and Nexus points marked
They’re all included, so you can plan your travel routes easily.
Where can I find ascension materials
Every material node appears across the map, and you can see their clusters clearly.
Does the map show boss locations
Yes, every boss encounter is listed.
Is this the full Wuthering Waves Interactive Map
It is. All categories in the world are included.
Credit: Wuthering Waves by MapGenie