![]()
Nioh 3 Interactive Map
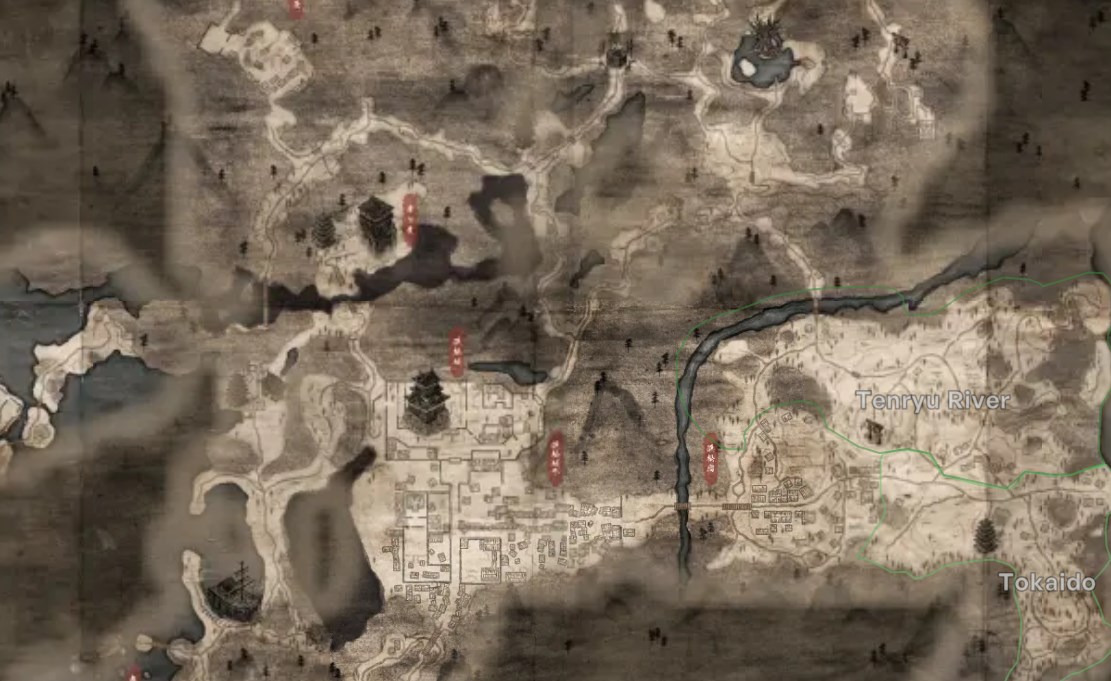
The Nioh 3 Interactive Map covers the Warring States region in full, tracking combat encounters, progression systems, exploration paths, loot, and collectibles in one connected view. Nioh 3 continues the series’ dense, mission-driven level design, where mastery comes from understanding layout just as much as combat mechanics.
Levels are layered, hostile, and full of hidden systems. Shrines, Kodama, Crucible encounters, and shortcuts all play into survival and build progression. This map gives structure to that complexity, helping you explore deliberately without stripping away the challenge.
How to Use the Nioh 3 Map
- Battles include Bosses, Lesser Crucibles, Crucible Wraiths, Crucible Spikes, Enemy Bases, Dark Realm zones, and Master encounters
- Exploration includes Amrita clusters, Hot Springs, Spirit Veins, and Wells
- Game Progress includes Main Missions, Side Missions, Myths, Shrines, and Bodhisattva Statues
- Loot & Collectibles include Chests, Valuables, Six Jizo, Kodama, Scampusses, Chijiko, Nurikabe, and Key Items
- Paths include Passages, Gates, Ladders, and Locked Doors
- Others include NPC locations and unique interactables
What the Map Can Do
Control difficulty through shrine planning
Shrines define pacing in Nioh 3. They are checkpoints, build management hubs, and the safest way to recover from mistakes. Seeing all shrine locations lets you plan how aggressively to push into enemy territory before resetting.
This is especially important in areas with Crucible encounters or enemy bases nearby, where one mistake can spiral quickly.
Track Crucible and Dark Realm threats
Crucible Wraiths, Lesser Crucibles, and Dark Realm zones act as difficulty spikes. They gate powerful rewards but demand preparation. With all Crucible-related elements visible, you can decide when to engage and when to bypass them until your build is ready.
Knowing where these zones overlap with paths and shrines makes a huge difference in survivability.
Optimize Amrita and progression routes
Amrita clusters, Spirit Veins, and Hot Springs are easy to miss but add up over time. With these shown clearly, you can build routes that maximize gains while minimizing unnecessary risk.
This is especially useful when replaying missions to farm experience or refine builds.
Complete collectibles without guesswork
Kodama, Six Jizo, Scampusses, and Chijiko all reward thorough exploration. Missing even a few can lock you out of bonuses or completion goals.
The map lets you clear collectibles systematically, focusing on one category at a time instead of scouring every corner blindly.
Navigate complex level layouts
Nioh 3 levels are full of vertical paths, locked doors, ladders, and hidden passages. Tracking these traversal elements helps you understand how areas loop back on themselves and where shortcuts unlock.
This turns exploration from trial-and-error into informed progression.
Nioh 3 Warring States Map Overview
This table summarizes the key map categories in the Warring States region and explains how each one supports combat flow, exploration, and progression.
| Category | Example | Why it matters |
|---|---|---|
| Shrine | Checkpoint hub | Recovery and build management |
| Crucible | High-risk encounter | Powerful rewards |
| Kodama | Hidden collectible | Permanent bonuses |
| Amrita | Experience cluster | Character progression |
| Shortcut | Ladder or gate | Safer traversal |
FAQs
Does this cover the full Nioh 3 Warring States map
Yes. All known areas, encounters, collectibles, and progression systems are included.
Are all shrines and checkpoints shown
Yes. Every shrine and key progression statue is mapped.
Does the map include Kodama and other collectibles
Yes. Kodama, Six Jizo, Scampusses, and related collectibles are included.
Is this useful for farming and replays
Yes. Amrita clusters, enemies, and shortcuts make this ideal for repeat runs.
Is this a complete Nioh 3 Interactive Map
Yes. All major combat, exploration, and progression elements are represented.
Credit: Nioh 3 by Wand