Grand Theft Auto San Andreas The Definitive Edition: All Collectible Locations
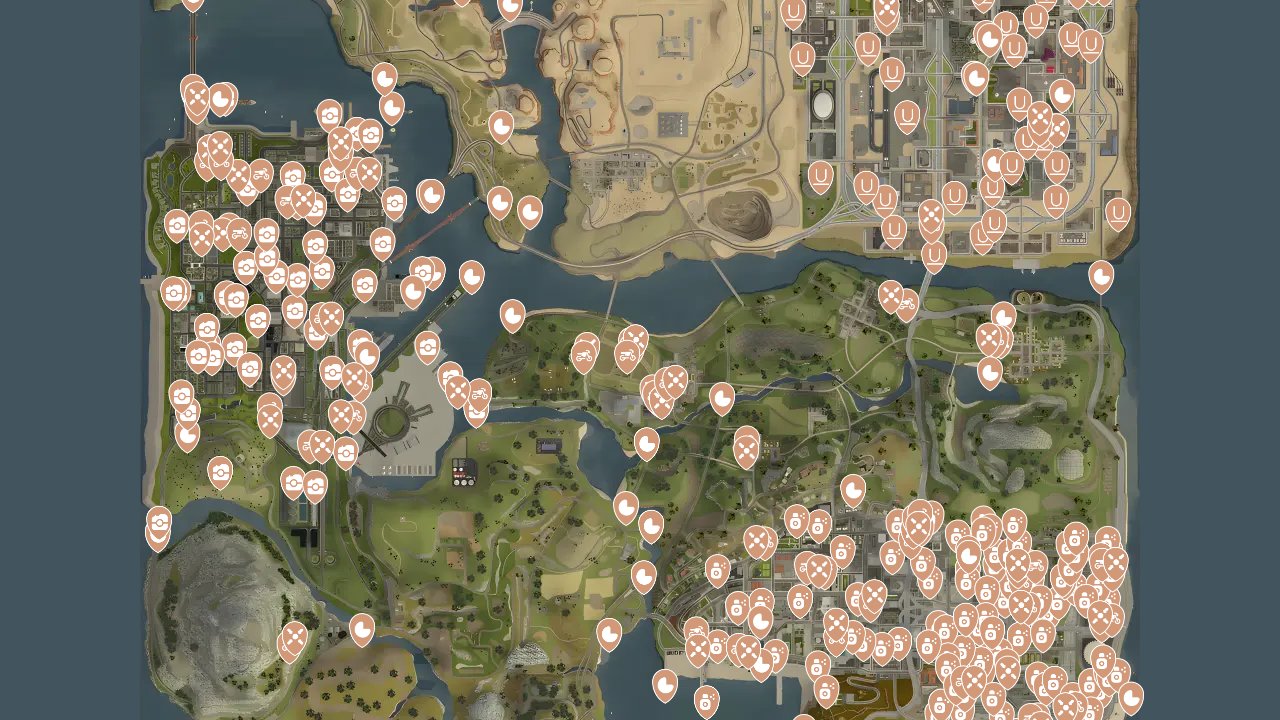
Collectibles in Grand Theft Auto San Andreas The Definitive Edition span six distinct types scattered across Los Santos, San Fierro, and Las Venturas. These items unlock weapons, cash rewards, and achievement progress while encouraging thorough exploration of the massive game world. The Grand Theft Auto San Andreas The Definitive Edition Interactive Map filters these collectibles by type, letting you plan efficient collection routes across each city. With 350 total items to find, systematic tracking prevents backtracking and ensures you don’t miss region-specific rewards.
What Collectibles Are Used For
Collectibles provide immediate gameplay benefits and unlock permanent rewards that enhance CJ’s capabilities throughout the story.
- Weapon spawns at Grove Street and other safehouses after collecting specific amounts
- Cash bonuses ranging from hundreds to thousands of dollars per collection milestone
- Increased maximum health, lung capacity, and sex appeal stats
- Achievement and trophy completion for 100% game progress
- Access to unique vehicles and special abilities in certain cases
Collectibles Types
Six different collectible categories are spread throughout San Andreas, each with unique collection mechanics and rewards.
Tag
Tags are graffiti spots found exclusively in Los Santos that CJ can spray over with his own Grove Street artwork. Collecting all 100 tags unlocks weapon spawns at the Johnson house including an AK-47, Tec-9, sawn-off shotgun, and Molotov cocktails. These are primarily located in Ganton, East Los Santos, and other Ballas territory areas.Oyster
Oysters are underwater collectibles scattered in bodies of water throughout San Andreas. Finding all 50 oysters increases CJ’s lung capacity and sex appeal to maximum levels. These require swimming or diving to reach, with many located in hard-to-spot underwater crevices around beaches, rivers, and pools.Snapshot
Snapshots are photo opportunities found only in San Fierro, requiring CJ to aim his camera at specific scenic locations. Collecting all 50 snapshots unlocks weapons at the Doherty garage including a micro SMG, sniper rifle, RPG, and flamethrower. Most snapshots highlight the city’s landmarks and tourist attractions.Horseshoe
Horseshoes are collectible items scattered throughout Las Venturas that provide luck-based benefits. Finding all 50 horseshoes spawns weapons at the Four Dragons Casino and increases gambling luck at casinos. These items are often hidden on rooftops, behind buildings, and in the desert areas surrounding the city.Stunt Jump
Stunt jumps are ramps and launch points that require specific vehicle approaches to complete successfully. All 70 stunt jumps must be cleared by landing in designated zones after launching from marked spots. Completing these unlocks monetary rewards and contributes to overall game completion percentage.Stunt Land
Stunt landing zones mark the target areas where successful stunt jumps must conclude. These locations correspond directly to nearby stunt jump starting points and help players understand the required trajectory and distance for each jump. Proper landing execution is essential for jump completion credit.How to Use the Map Efficiently
Planning collection routes by city and transportation method maximizes efficiency while minimizing travel time across San Andreas.
- Focus on one city at a time rather than jumping between Los Santos, San Fierro, and Las Venturas
- Use helicopters or planes for rooftop horseshoes and hard-to-reach snapshot locations
- Collect oysters during swimming skill training sessions to combine stat building with item hunting
- Group nearby stunt jumps together and use appropriate vehicles for each jump type
- Save tags for last since they’re concentrated in gang territory that becomes safer after story progress
- Equip the camera before starting snapshot collection routes in San Fierro
Collectibles Locations Table
Each collectible type offers specific rewards and requires different collection methods.
| Type | What You Get | Notable Detail |
|---|---|---|
| Tag | Weapon spawns at Grove Street | Los Santos only, requires spray can |
| Oyster | Max lung capacity and sex appeal | Underwater locations, swimming required |
| Snapshot | Weapon spawns at Doherty garage | San Fierro only, camera required |
| Horseshoe | Casino weapons and gambling luck | Las Venturas only, rooftop locations |
| Stunt Jump | Money rewards and completion % | Vehicle-specific launch requirements |
| Stunt Land | Jump completion verification | Target zones for successful landings |
Tips for Collectibles Hunting
- Save before attempting difficult stunt jumps to retry without losing progress
- Use the in-game statistics menu to track your collection progress by type
- Bring oxygen tanks or scuba gear for deep underwater oyster locations
- Check building rooftops and construction sites for hidden tags and horseshoes
- Use motorcycles for precise stunt jump positioning and better landing control
- Complete the camera mission in San Fierro before hunting snapshots for better photo mechanics
FAQs
Do I need to collect all collectibles for 100% completion?
Yes, collecting all tags, oysters, snapshots, horseshoes, and completing all stunt jumps is required for 100% game completion in San Andreas.
Can I collect items before unlocking all areas of the map?
Some collectibles in locked areas can be reached early using aircraft or boats, but most are easier to collect after completing story missions that unlock those regions.
What happens if I fail a stunt jump?
Failed stunt jumps can be reattempted immediately without penalty. The jump only counts as completed when you successfully land in the designated target zone.
Are weapon spawns from collectibles permanent?
Yes, weapon spawns from tags, snapshots, and horseshoes appear permanently at their respective locations and respawn after being collected.
Credit: Grand Theft Auto San Andreas The Definitive Edition by Wand