![]()
Dragon Quest 1 Map
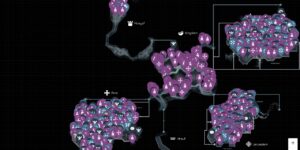
The Dragon Quest 1 Map provides complete coverage of Alefgard, the legendary world where the original Dragon Quest adventure unfolds. This interactive map tracks every essential location, item, enemy, and quest across the entire realm, from the starting town of Tantegel to the deepest dungeons where the Dragonlord awaits. With comprehensive markers for shops, inns, dungeons, collectibles like Mini Medals and Seeds, plus all equipment and quest objectives, this mapping tool transforms navigation through one of gaming’s most influential RPGs.
Dragon Quest 1’s open-world design gives players freedom to explore Alefgard at their own pace, but this freedom can overwhelm newcomers unfamiliar with the game’s systems. The Dragon Quest 1 Map eliminates guesswork by clearly marking critical services like banks and clergy for healing, item shops for equipment upgrades, and secret spots containing rare treasures. Whether you’re hunting down specific armor pieces, tracking down elusive Mini Medals, or planning efficient routes between towns and dungeons, this interactive map ensures you never miss important content in your quest to defeat the Dragonlord.
How to Use the Dragon Quest 1 Map
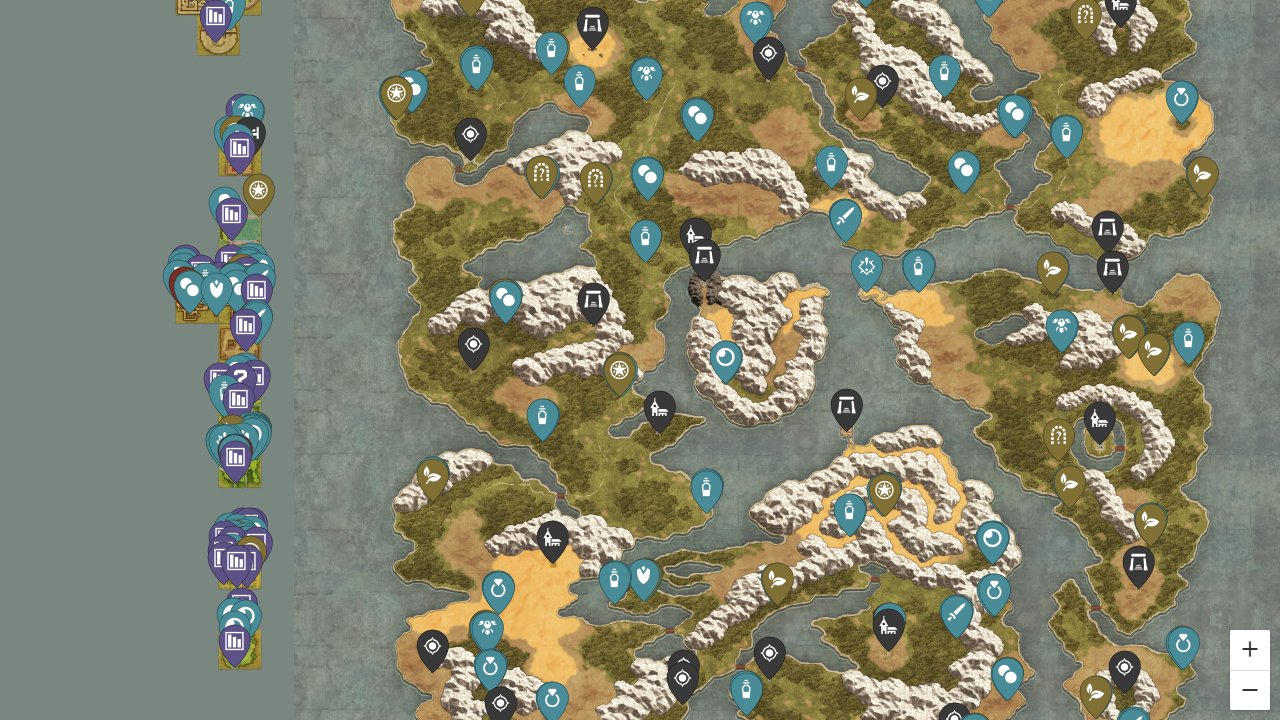
The map organizes locations and exploration markers into clear categories covering towns, dungeons, and essential services. Town markers identify banks for gold storage, clergy for healing and status removal, plus inns for rest and recovery. Dungeon markers highlight major locations like Tantegel Castle’s lower levels, the treacherous Swamp Cave, and Charlock Castle where the final battle awaits. These location markers form the backbone of efficient travel planning across Alefgard.
Combat preparation becomes streamlined through enemy and boss markers that reveal creature locations and difficulty zones. Enemy markers help you identify safe grinding spots for experience and gold farming, while boss markers prepare you for major encounters like the Green Dragon and Golem. This information proves invaluable when planning character progression routes or avoiding areas beyond your current power level.
Equipment and resource management receives comprehensive support through detailed item tracking. Weapon, armor, shield, and headgear markers show where to acquire essential gear upgrades, while accessory markers highlight special items that boost your capabilities. Gold coin markers supplement your treasury, and scroll markers reveal spell locations. Seed markers identify permanent stat-boosting items scattered throughout the world.
Quest progression stays organized through main quest and side quest markers that guide your adventure from beginning to end. Main quest markers ensure you never lose track of primary objectives like rescuing Princess Laura or obtaining the Rainbow Drop. Side quest markers reveal optional content and additional rewards that enhance your character’s power and provide valuable resources for the final confrontation.
What the Dragon Quest 1 Map Can Do
Optimize Your Adventure Routes
The interactive map eliminates inefficient backtracking by showing optimal paths between towns, dungeons, and key locations. You can plan multi-stop journeys that combine equipment shopping, quest objectives, and item collection into single efficient routes. This route optimization becomes crucial in Dragon Quest 1’s challenging world where every step costs time and potentially MP for return spells.
Master Equipment Progression
Equipment markers reveal the exact locations of every weapon, armor piece, shield, and accessory in Alefgard. This comprehensive equipment tracking helps you plan upgrade paths from basic leather armor to the legendary Erdrick’s equipment set. You can identify when and where to acquire specific gear pieces that dramatically improve your combat effectiveness against increasingly dangerous enemies.
Complete Collectible Hunts
Mini Medal and Secret Spot markers ensure you discover every hidden treasure scattered across the world. These collectible markers reveal secret areas that casual exploration might miss, including concealed passages in towns and hidden items in remote wilderness locations. Complete collectible tracking maximizes your character’s potential and uncovers rare resources that provide significant advantages.
Navigate Dangerous Territory Safely
Enemy markers provide crucial intelligence about creature distribution and danger levels across different regions. You can identify safe paths to objectives, locate ideal grinding spots for experience farming, and avoid overwhelming encounters until you’re properly equipped. This enemy intelligence prevents costly deaths and wasted progress in Dragon Quest 1’s unforgiving combat system.
Track Quest Progress Efficiently
Quest markers maintain clear progression tracking through Dragon Quest 1’s interconnected storyline and optional content. You can see which main story objectives remain incomplete and discover side quests that provide valuable rewards or character development. This quest tracking prevents missed opportunities and ensures you experience all the content this classic RPG offers.
Dragon Quest 1 Map Overview
A quick reference for the key features of this interactive map.
| Category | Example | Why It Matters |
|---|---|---|
| Locations & Services | Tantegel Castle, Cantlin Inn | Essential for healing, equipment, and safe rest points |
| Equipment Tracking | Magic Sword, Dragon Scale | Guides optimal upgrade paths and combat readiness |
| Quest Objectives | Princess Laura rescue, Dragonlord confrontation | Maintains story progression and completion tracking |
| Combat Intelligence | Metal Slime locations, Boss encounters | Enables strategic grinding and encounter preparation |
| Hidden Treasures | Mini Medals, Secret gold stashes | Maximizes character power and resource collection |
Frequently Asked Questions
What does this Dragon Quest 1 map cover?
The map covers the complete world of Alefgard, including all towns, dungeons, shops, inns, and services. It tracks every piece of equipment, all collectible items like Mini Medals and Seeds, plus comprehensive quest and enemy markers throughout the entire game world.
How does this map help with completion?
The map ensures 100% completion by marking every collectible Mini Medal, Secret Spot, and important item location. Quest markers track both main story progression and optional side content, while equipment markers guide you to every weapon, armor piece, and accessory needed for maximum character development.
Are collectibles included?
Yes, the map includes comprehensive collectible tracking for Mini Medals, Seeds that permanently boost stats, and Secret Spots containing rare treasures. These collectible markers reveal hidden items that casual exploration often misses, ensuring you maximize your character’s potential power.
Does this map cover progression systems?
The map supports character progression through detailed equipment tracking, enemy location markers for optimal grinding spots, and quest progression markers. You can plan efficient upgrade paths, identify safe farming locations, and track story advancement through the comprehensive marker system.
Is this map complete?
The map provides complete coverage of Dragon Quest 1’s content, including every location, item, enemy, and quest throughout Alefgard. All essential services, equipment pieces, collectibles, and story objectives are marked with detailed categories that cover the entire game experience from start to finish.
Credit: Dragon Quest 1 Map by MapGenie