![]()
All Locations: Stalker 2 Heart Of Chornobyl Guide

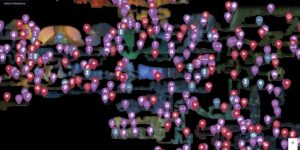
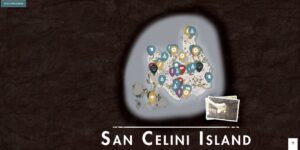
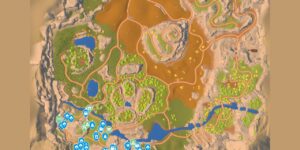
Every Location in Stalker 2 Heart Of Chornobyl serves as a critical waypoint for navigation, resource gathering, and story progression through the Zone’s dangerous territories. The Stalker 2 Heart Of Chornobyl Interactive Map consolidates all location markers into a single filterable view, letting you plan efficient routes between settlements, anomalies, and hidden caches. Understanding where each location type sits in relation to your current objectives saves precious time and ammunition. Whether you’re hunting for rare artifacts near arch anomalies or seeking safe beds for rest, having all locations mapped out prevents costly detours through hostile territory.
What Location Are Used For
Location markers serve as the backbone of Zone navigation, marking everything from safe havens to dangerous anomaly fields that can either kill you or reward you with valuable artifacts.
- Find safe rest points and trader bases for resupplying ammunition and equipment
- Locate artifact-rich anomaly fields for high-value loot collection
- Plan routes around or through dangerous areas based on your current gear level
- Track entrance points to underground areas and restricted facilities
- Mark personal stash locations for long-term item storage across the Zone
Location Types
The Zone contains eight distinct location types, each serving different survival and exploration needs across Stalker 2’s hostile landscape.
Arch Anomaly
Arch anomalies represent some of the most dangerous yet rewarding locations in the Zone. These electromagnetic distortions can instantly kill unprepared stalkers but often contain high-tier artifacts worth substantial rubles. Always bring proper protective gear and detector equipment when approaching these sites.Base
Bases function as major hub locations where you can trade with merchants, upgrade equipment, and accept contracts from faction leaders. These fortified positions offer complete safety from Zone dangers and serve as fast-travel points once discovered. Stock up on supplies and repair gear before venturing out from any base.Bed
Bed locations provide crucial rest points that restore health and save your progress without requiring a return to major settlements. These safe houses are scattered throughout dangerous areas, offering temporary refuge when you’re deep in hostile territory. Always note nearby bed locations before entering high-risk zones.Location
General location markers identify significant landmarks, settlements, or geographical features that serve as navigation reference points. These help orient yourself within the Zone’s complex layout and often mark areas where multiple quest lines converge. Many contain secondary objectives or environmental storytelling elements.Point of Interest
Points of interest mark unique or noteworthy sites that don’t fit other categories but deserve investigation. These might include crashed helicopters, abandoned research stations, or mysterious phenomena that provide lore insights or rare items. Exploration of these sites often rewards curious stalkers with unique discoveries.Entrance
Entrance markers identify access points to underground facilities, restricted areas, or multi-level locations. Some entrances require specific keys or story progression to unlock, while others lead to optional exploration areas. These are crucial for quest completion and accessing hidden areas.Locked Door
Locked door locations require specific keys, codes, or story progression to access. They often guard valuable loot, quest items, or shortcuts through dangerous areas. Keep track of these locations as you acquire the necessary access methods throughout your journey.Personal Stash
Personal stashes provide permanent storage solutions throughout the Zone, letting you cache valuable items for later retrieval. These locations become increasingly important as you accumulate rare artifacts and equipment that exceed your carrying capacity. Strategic stash placement can support extended exploration expeditions.How to Use the Map Efficiently
Smart location planning prevents unnecessary backtracking through the Zone’s radiation-soaked territories while maximizing your survival chances.
- Plot routes that connect multiple bed locations for safe progression through dangerous areas
- Identify base locations near anomaly fields to minimize travel time when artifact hunting
- Mark personal stash sites along your planned exploration routes for efficient inventory management
- Note locked door locations and track which keys or quest progress you need for access
- Plan circular routes that start and end at bases to ensure you can always return for resupply
- Use entrance markers to identify underground shortcuts that bypass surface-level radiation zones
Location Locations Table
Each location type serves specific gameplay functions within the Zone’s survival ecosystem.
| Type | What You Get | Notable Detail |
|---|---|---|
| Arch Anomaly | High-tier artifacts, rare materials | Extremely dangerous without proper gear |
| Base | Traders, upgrades, fast travel | Complete safety and quest hubs |
| Bed | Health restoration, save points | Scattered safe rest locations |
| Location | Navigation landmarks, story beats | Major geographical reference points |
| Point of Interest | Unique loot, lore discoveries | Often contain environmental storytelling |
| Entrance | Access to underground areas | May require keys or quest progression |
| Locked Door | Protected loot, shortcuts | Need specific access methods |
| Personal Stash | Permanent item storage | Essential for long-term item management |
Tips for Location Hunting
- Always mark bed locations on your map before venturing into new territories
- Visit bases regularly to repair equipment and stock up on medical supplies
- Approach arch anomalies with full health and protective gear equipped
- Use personal stashes to store excess artifacts near trading bases
- Keep a mental note of locked doors and return when you have the required access
- Explore points of interest thoroughly as they often contain multiple rewards
FAQs
Can I fast travel between all base locations?
Fast travel is only available between discovered base locations, and you must be in a safe area to initiate travel. Underground or hostile areas prevent fast travel usage.
Do personal stashes share inventory between locations?
No, each personal stash maintains separate inventory. Items stored in one stash location cannot be accessed from another stash elsewhere in the Zone.
Are arch anomalies always active?
Yes, arch anomalies remain permanently active and dangerous. Their electromagnetic fields will damage or kill you regardless of story progression, so proper protective equipment is always required.
Can locked doors be forced open without keys?
Most locked doors require specific keys, codes, or quest progression to open. While some may be bypassed through alternative routes, forcing them open is generally not possible without the proper access method.
Credit: Stalker 2 Heart Of Chornobyl by Wand