![]()
All Boss Locations in Dragon’s Dogma 2
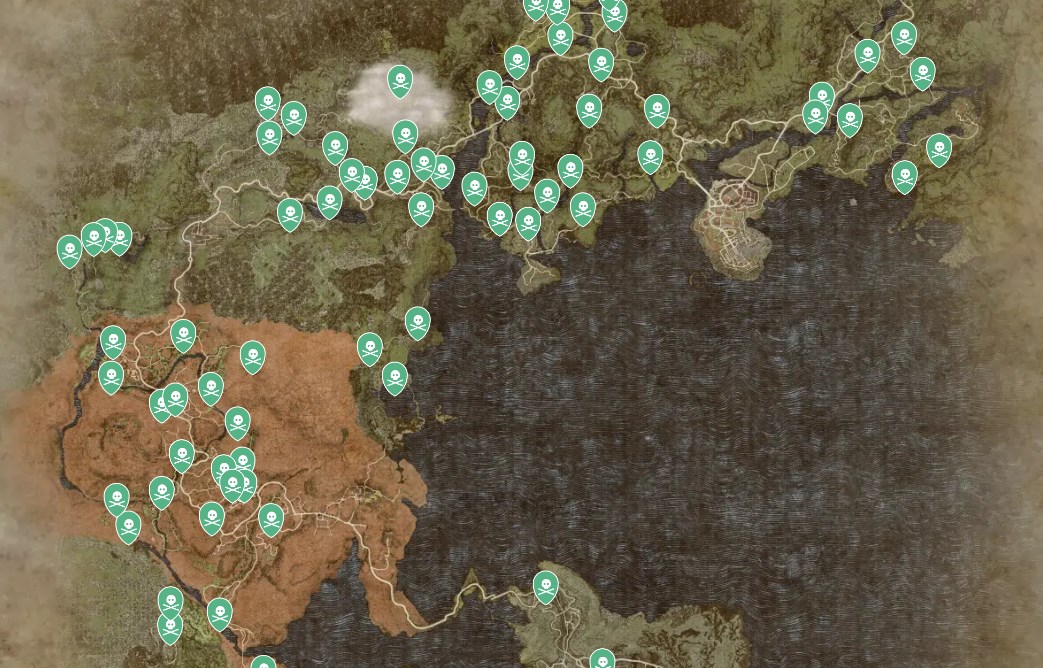
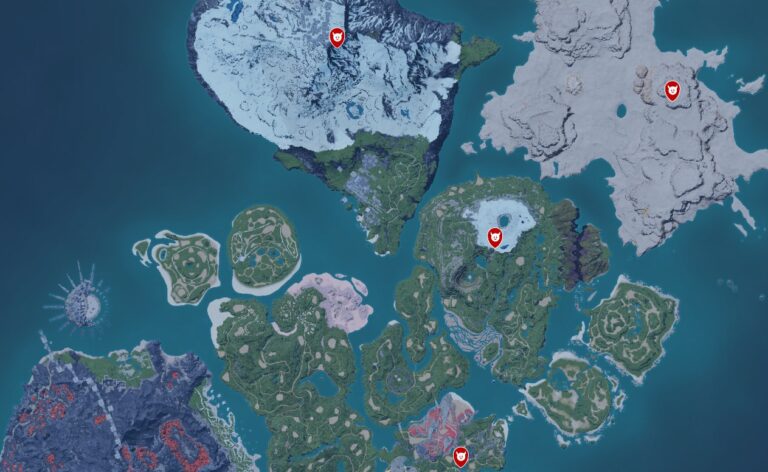
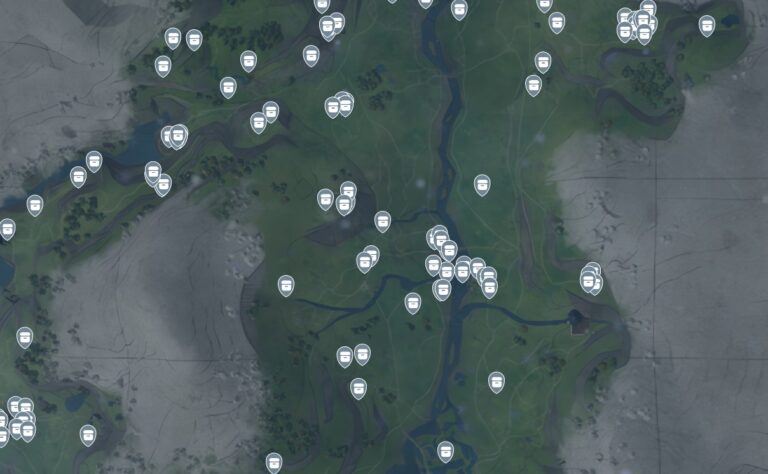
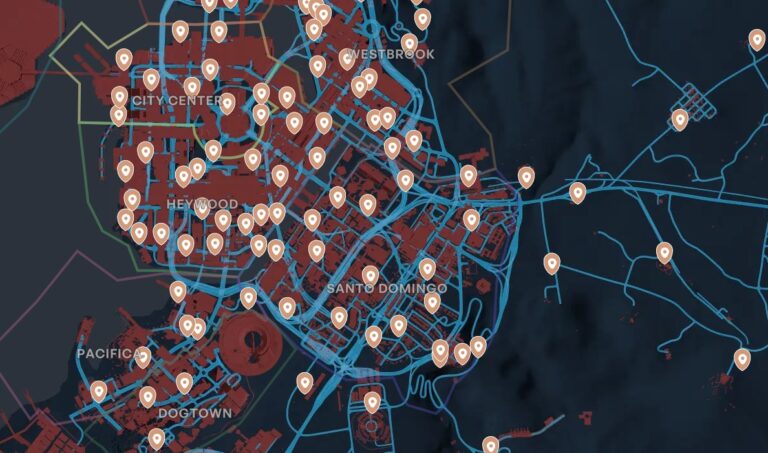
Boss encounters are a huge part of progression, gearing, and build testing in Dragon’s Dogma 2, and they’re spread across the world in ways that reward both exploration and preparation. This guide uses the Dragon’s Dogma 2 Interactive Map to show all boss locations included in this dataset, so you can see exactly where every major enemy can appear.
From roaming Cyclopes and Ogres to high-end threats like Drakes, Medusa, and Dullahan, boss placement in Dragon’s Dogma 2 isn’t random noise. Certain enemies dominate specific regions, some only appear at night, and others spawn conditionally after different encounters are cleared. This guide focuses only on Boss pins shown on the map, explaining what types of bosses exist, how they’re distributed, and what players can learn from their drops when planning routes, farming materials, or hunting specific gear.
How To Find Bosses
- Cyclops bosses are the most common large enemies and appear across many regions as early and repeatable encounters
- Armored Cyclops variants indicate tougher fights with higher durability and stronger drop pools
- Ogre and Grim Ogre bosses emphasize aggressive melee combat and stamina pressure
- Minotaur bosses represent mid-to-high threat encounters and often gate strong crafting materials
- Chimera bosses combine multiple attack types and reward balanced party setups
- Golem bosses focus on weak-point destruction and elemental awareness
- Drake bosses are late-game threats tied to rare upgrade materials and resurrection items
- Gryphon and Griffin bosses favor open terrain and aerial pressure
- Dullahan, Wight, and Fell-Lord are night-only or conditional spawns tied to unique loot
- Medusa represents a rare, high-value boss with legendary-tier rewards
- Griffin Nest and Forested Griffin Nest markers indicate random or repeatable spawn locations
Locations for All Bosses
Boss placement in Dragon’s Dogma 2 creates a natural difficulty curve as you explore further from safer regions. Early areas lean into Cyclopes, Ogres, and Minotaurs, while deeper or more dangerous zones introduce Drakes, Golems, and night-only undead bosses. Knowing how these encounters are spaced out helps with both survival and efficiency.
Common and Regional Boss Encounters
Cyclops, Armored Cyclops, Ogre, and Minotaur bosses make up the backbone of the world’s boss ecosystem. These enemies appear frequently and often multiple times across the map, which makes them ideal for farming crafting materials like Rugged Bone, Misshapen Eye, Ogre Spur, Monster Hide, and Minotaur Horn.
Because these bosses repeat, players can learn their attack patterns early and use them as benchmarks for party strength. Armored Cyclopes in particular signal a step up in difficulty, often dropping higher quantities of materials or rarer variants. Minotaurs frequently appear as follow-up spawns or progression checks, reinforcing the idea that some locations escalate after earlier threats are cleared.
High-Value and Late-Game Bosses
Drakes, Golems, Chimeras, and Medusa define the upper tier of boss encounters. Drake locations are especially important, as their drops include Wyrmslife Crystals, Dragon Scales, Wakestones, and other endgame materials. These bosses often appear with high health bar counts, clearly marking them as encounters you prepare for rather than stumble into.
Golems add mechanical complexity through weak-point targeting and elemental interactions, while Chimeras test party balance with mixed enemy types. Medusa stands apart as a rare encounter with legendary-tier rewards, making her location one of the most valuable pins on the map.
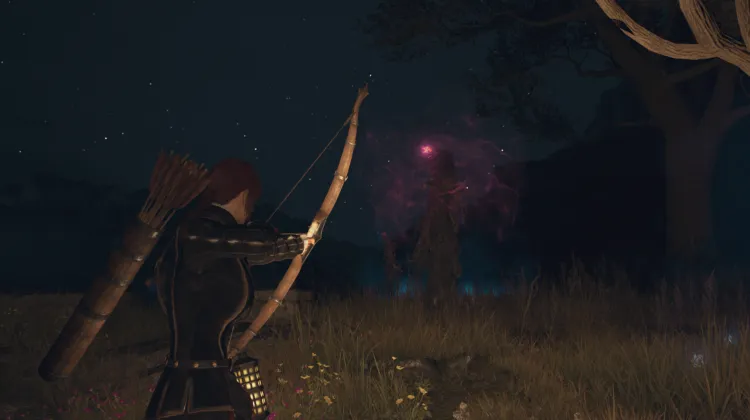
Night-Only and Conditional Bosses
Several bosses in this dataset only appear under specific conditions. Wight and Fell-Lord encounters are tied to nighttime spawns, meaning their locations aren’t always active. Dullahan also falls into this category, acting as a dangerous roaming threat with unique drops that aren’t easily replaced elsewhere.
Griffin Nests and Forested Griffin Nests introduce another layer of unpredictability, as Griffins may spawn randomly rather than being guaranteed. These locations are still valuable because they show where aerial bosses are most likely to appear, helping players plan ambushes or farming routes.
Boss Locations Table
Here’s a quick overview of the boss types shown on the map, including health bars and notable drops.
| Boss Type | Health Bars | Notable Drops |
|---|---|---|
| Cyclops | 2 | Rugged Bone, Misshapen Eye |
| Armored Cyclops | 2 | Rugged Bone, Misshapen Eye, Scrag of Beast |
| Ogre / Grim Ogre | 3–4 | Ogre Spur, Ogre Talon, Monster Hide |
| Minotaur | 4 | Minotaur Horn, Monster Hide, Ferrystone |
| Chimera | 4 | Freakish Mane, Monster Fang, Allheal Elixir |
| Golem | 2–5 | Magick Medal, Dappled Ore, Electrum |
| Drake | 7–8 | Wyrmslife Crystal, Dragon Scale, Wakestone |
| Gryphon / Griffin | 5 | Griffin Pinion, Great Griffin Claw |
| Dullahan | 4 | Cursed Dullahan Bone |
| Wight / Fell-Lord | 3 / N/A | Black Crystal, Unique Weapons |
FAQs
Does this guide show all boss locations in Dragon’s Dogma 2?
Yes. It covers every Boss pin included in this dataset using the Dragon’s Dogma 2 Map.
Are all bosses guaranteed to spawn?
No. Some bosses like Griffins, Dullahan, Wights, and Fell-Lord are conditional or night-only spawns.
Which bosses are best for farming materials?
Cyclops, Armored Cyclops, Ogre, and Minotaur bosses are ideal for repeat farming due to frequent spawns.
Where do Drake bosses fit in progression?
Drakes are late-game encounters tied to some of the strongest upgrade materials and revival items.
Are legendary items tied to specific bosses?
Yes. Medusa and certain high-end bosses drop unique or legendary-tier rewards.
Credit: Dragon’s Dogma 2 Map by Wand