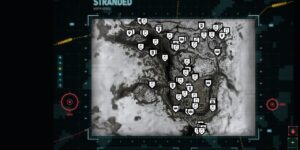
Zelda A Link Between Worlds Map

Two kingdoms separated by crumbling walls hide more secrets than any single playthrough will naturally uncover – and that tension between Hyrule’s sunlit fields and Lorule’s fractured, shadow-soaked mirror image is exactly what makes navigation so demanding. Our Zelda A Link Between Worlds Map tracks every dungeon entrance, Maiamai nest, Heart Piece, and rental item location across both dimensions, giving you precise visual markers instead of vague written directions. The wall-merging mechanic opens paths that would otherwise look like dead ends, so having a reliable reference is less a luxury and more a necessity.
Chasing 100% completion means juggling collectibles spread across two distinct worlds that share geography but invert almost every rule – a chest tucked behind a cracked wall in Hyrule might only be reachable from the Lorule side. The Zelda A Link Between Worlds Map handles that complexity by updating markers as you progress, so you always know what still needs attention rather than backtracking through areas you think you have already cleared. Whether your goal is rescuing every sage or simply hunting down that final missing Heart Piece, every significant location in both kingdoms is accounted for here.
How to Use the Zelda A Link Between Worlds Map
Locations and exploration markers guide your journey through both Hyrule and Lorule’s overworlds. These markers highlight dungeon entrances, important NPCs, shops, and dimensional portals that connect the two worlds. The system helps you understand the spatial relationship between corresponding locations in each dimension, making wall-merging puzzles and cross-dimensional navigation significantly more manageable.
Collectibles tracking covers the extensive array of items scattered throughout both kingdoms. Heart Pieces, Maiamais (the baby squid creatures), and various treasure chests receive dedicated markers with detailed acquisition notes. This systematic approach prevents backtracking confusion and ensures you can efficiently sweep each area for completion rewards.
Equipment and dungeon categories work together to track your progression through the game’s rental system and major story locations. Equipment markers show where to find permanent upgrades and special items, while dungeon markers provide entrance locations and completion status. This dual-tracking system helps optimize your item rental strategy and ensures you’re properly equipped for each challenge.
What the Zelda A Link Between Worlds Map Can Do
Optimize Dimensional Travel Routes
Planning efficient routes between Hyrule and Lorule becomes straightforward when you can visualize all available portals and wall-merge points. The map reveals optimal pathways for accessing remote areas and helps you understand which dimension offers the most direct route to your destination.
Track Maiamai Collection Progress
Collecting all 100 Maiamai creatures requires systematic exploration of both worlds. The interactive markers prevent duplicate searches and highlight the most challenging hiding spots, including those requiring specific items or dimensional shifts to access.
Manage Item Rental Strategy
The rental system in A Link Between Worlds creates unique inventory management challenges. Mapping tools help you plan which items to rent for specific dungeon sequences and exploration goals, minimizing unnecessary rupee expenditure while ensuring you have the right tools for each area.
Plan Heart Piece Collection Routes
Heart Pieces often require complex sequences involving both dimensions and multiple items. The map reveals which pieces can be collected together in efficient loops and which require specific story progression or equipment to access.
Coordinate Dungeon Completion Order
Unlike traditional linear Zelda games, A Link Between Worlds allows flexible dungeon progression. The map helps you visualize dungeon locations across both worlds and plan completion sequences that maximize your exploration efficiency and story progression.
Zelda A Link Between Worlds Map Overview
A quick reference for the key features of this interactive map.
| Category | Example | Why It Matters |
|---|---|---|
| Locations | Dimensional portals, shops, NPCs | Essential for navigating between Hyrule and Lorule efficiently |
| Collectibles | Maiamais, Heart Pieces, treasure chests | Required for 100% completion and character upgrades |
| Equipment | Permanent upgrades, special items | Optimizes rental strategy and dungeon preparation |
| Dungeons | Palace entrances, boss locations | Tracks progression through both worlds’ major challenges |
| Exploration | Wall-merge spots, hidden areas | Reveals secrets unique to the dimensional mechanics |
Frequently Asked Questions
What does this Zelda A Link Between Worlds map cover?
The map covers both Hyrule and Lorule dimensions, tracking all collectibles, equipment locations, dungeon entrances, and important NPCs. Every Maiamai, Heart Piece, and treasure chest receives precise location markers with acquisition details.
How does this map help with completion?
The interactive system prevents missing collectibles by providing systematic tracking across both dimensions. Progress indicators show which areas you’ve completed and highlight remaining objectives for 100% completion.
Are collectibles included?
Yes, all 100 Maiamais, every Heart Piece, treasure chests, and upgrade materials receive detailed markers. The system includes acquisition requirements and optimal collection routes for efficient gathering.
Does this map cover progression systems?
The map tracks dungeon completion, item rental optimization, and equipment upgrades. Story progression markers help you understand which areas become accessible at different points in your adventure.
Is this map complete?
The map provides comprehensive coverage of both Hyrule and Lorule, including all major locations, collectibles, and secrets. Regular updates ensure accuracy and completeness for optimal exploration support.
Credit: Zelda A Link Between Worlds Map by MapGenie