Pokemon Red Blue Yellow Map

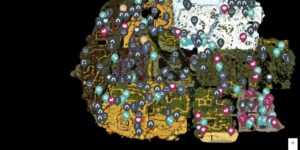
The Pokemon Red Blue Yellow Map on GameMappers.com gives trainers a fully interactive view of the Kanto region, covering every key location, item pickup, NPC encounter, obstacle, and battle across the entire game world. Whether you’re hunting down every TM, planning your gym route, or trying to remember where that one HM was hidden, this map puts the whole region at your fingertips. Every marker has been organized into clear categories so you can filter exactly what you need without wading through irrelevant information.
Pokemon Red, Blue, and Yellow are dense games packed with missable items, hidden traders, and one-time battles that can permanently affect your playthrough. A resource like this is especially valuable for these titles because so much of Kanto’s content is tucked away in caves, locked behind obstacles, or gated by specific NPCs that are easy to overlook on a first run. The Pokemon Red Blue Yellow Map removes the guesswork and lets you focus on building your team and progressing efficiently through one of gaming’s most iconic adventures.
How to Use the Pokemon Red Blue Yellow Map
Locations and Exploration: The map marks every Area, Cave, and Pokemon Center across Kanto. Use these markers to orient yourself when moving between towns and routes, or to quickly identify the nearest healing point before pushing into a dangerous dungeon like Rock Tunnel or Victory Road. Knowing exactly where each Pokemon Center sits relative to your current position saves significant backtracking time.
Services and Vendors: Notable NPCs, Shops, and Traders are all pinned separately, making it easy to plan stops for restocking supplies or completing one-off item exchanges. Traders in particular are easy to miss since they blend into the world without any map indicator in-game. Filtering this category alone surfaces every trade opportunity in Kanto so nothing slips through the cracks.
Loot and Resources: HMs, standard Items, Key Items, and TMs each have their own marker type, giving you a granular view of every obtainable item in the game. Key Items and HMs are especially important to track because they unlock progression and movement across the entire map. Filtering TMs lets you plan ahead for which moves your team can learn before you even reach the relevant area.
Obstacles: Movable Boulders and Small Plants are marked as their own category, which is a practical feature for players who need Strength or Cut to proceed. Knowing exactly where these obstacles appear helps you decide when to acquire the relevant HM and whether a detour is worth it for the reward waiting on the other side.
Battles: Gym Leaders, Elite Four members, and Trainers all appear as distinct markers. Reviewing Trainer placements before entering a route lets you mentally prepare for the experience and item drain ahead, while Gym Leader and Elite Four markers serve as progression checkpoints you can use to benchmark your team’s readiness.
What the Pokemon Red Blue Yellow Map Can Do
Optimize Your Route Through Kanto
Kanto’s linear structure hides a surprising number of optional branches, backtrack opportunities, and sequence breaks that reward players who plan ahead. By reviewing Area and Cave markers before setting out, you can identify which detours yield HMs or Key Items that open up faster paths later. Routing efficiently through the region means fewer dead ends and more time spent on the content that matters to your playthrough.
Track Every Item Without Missing a Single One
Pokemon Red, Blue, and Yellow scatter items across routes, buildings, and hidden floor tiles, and many of them only appear once. The map’s Item, TM, HM, and Key Item markers give you a complete checklist of everything available in Kanto. For completionists aiming for full item collection or competitive players building specific movesets, this layer of visibility is invaluable and saves hours of blind exploration.
Prepare for Every Major Battle
Gym Leaders and the Elite Four represent the hardest difficulty spikes in the game, and their type compositions demand targeted team-building. Using the Battles category on the map, you can trace the exact path to each Gym Leader and cross-reference nearby TM locations to pick up moves your team needs before the fight. Trainer markers along the route also let you estimate how much PP and healing resources you will burn before reaching the boss.
Manage HM Dependency and Obstacle Planning
HM usage is one of the most restrictive mechanics in the original Pokemon games, requiring specific moves to bypass Movable Boulders and Small Plants that block access to new areas. The map surfaces every one of these obstacles alongside the HM pickups needed to clear them, so you can plan your HM slave strategy early and avoid painting yourself into a corner. This is particularly useful for players running smaller or theme-restricted teams who need to budget HM slots carefully.
Support Trade and NPC Interactions
Several of Kanto’s Traders offer unique Pokemon that are otherwise unavailable or difficult to obtain, and missing them on a single playthrough can lock out certain Pokedex entries. The NPC markers on this map pinpoint every Trader and Notable NPC location so you can make deliberate stops rather than stumbling across them by accident. For players working toward a complete Pokedex, these markers are some of the most useful on the entire map.
Pokemon Red Blue Yellow Map Overview
A quick reference for the key features of this interactive map.
| Category | Example | Why It Matters |
|---|---|---|
| Locations | Pokemon Centers, Caves, Areas | Keeps you oriented across Kanto’s routes and dungeons, ensuring you never lose track of the nearest healing spot |
| Items | TMs, HMs, Key Items | Surfaces every obtainable item in the game so completionists and competitive players can plan movesets and collections |
| Battles | Gym Leaders, Elite Four, Trainers | Helps you gauge difficulty spikes ahead and prepare your team’s moves and items before critical fights |
| NPC’s | Traders, Shops, Notable NPCs | Flags one-time trade opportunities and essential vendors so no unique Pokemon or item exchange gets missed |
| Obstacles | Movable Boulders, Small Plants | Identifies every HM-gated barrier in Kanto so you can plan Cut and Strength usage without wasting team slots |
Frequently Asked Questions
What does this Pokemon Red Blue Yellow map cover?
The Pokemon Red Blue Yellow Map covers the entire Kanto region across five categories – Locations, NPCs, Items, Obstacles, and Battles. Every marker type from Pokemon Centers and Caves to Gym Leaders, Traders, TMs, HMs, Key Items, and HM-gated obstacles like Movable Boulders and Small Plants is included in a single interactive layer system.
How does this map help with game completion?
The map helps you track every item, battle, and NPC interaction needed for full completion. Filtering by TMs, Key Items, and Traders highlights the content most commonly missed on a standard playthrough. Completionists can work through each category systematically rather than relying on memory or repeated trial-and-error exploration.
Are collectibles included on this map?
Yes. The map marks every Item, TM, HM, and Key Item available in the game. TMs are particularly valuable as collectibles since most are one-time pickups that teach permanent moves to your Pokemon. Every one of these is pinned so you can filter the category and check off each pickup as you progress through Kanto.
Does this map cover progression systems in Pokemon Red Blue Yellow?
Absolutely. Gym Leaders and the Elite Four are marked as distinct battle types, giving you a clear view of every mandatory progression gate in the game. HM locations and Obstacle markers work together to show exactly which moves you need and where to get them before key areas become accessible, keeping your progression smooth from Pallet Town to the Pokemon League.
Is this map complete for all three games – Red, Blue, and Yellow?
The map covers the shared Kanto region that forms the foundation of all three games. Since Red, Blue, and Yellow share the same overworld layout, routes, dungeons, and major NPC placements, the interactive map serves as an accurate reference for players of any version. Minor version-exclusive differences exist in Pokemon availability, but the map’s location, item, and battle markers apply consistently across all three titles.
Credit: Pokemon Red Blue Yellow Map by MapGenie